本文最后更新于:2024年5月11日 上午
一、Request&Response简介
我们自己创建的那些类,主要就是重写doGet和doPost方法,它们里面的两个参数就是(HttpServletRequest req, HttpServletResponse resp)
Web服务器收到客户端的http请求,会针对每一次请求,分别创建一个用于代表请求的request对象、和代表响应的response对象。
服务器处理请求的流程
- 服务器收到请求,开辟一个新的线程
- 将客户端请求数据封装到request对象中
- 创建response对象,用来向客户端发送响应,服务器解析response对象后响应给浏览器
二、Response对象及其应用
Http的响应包含状态行、实体内容、消息头、空行组成
1、Response实现重定向
重定向:将网络请求重新定向发送到其他位置。它是服务器通知浏览器去访问另一个网址,让浏览器再发送一个请求
编写代码如下 :
1
2
3
4
5
6
7
8
9
10
11
| public class RediectServlet extends HttpServlet {
@Override
protected void doGet(HttpServletRequest req, HttpServletResponse resp) throws ServletException, IOException {
resp.sendRedirect("/s1/imageShow");
}
}
|
2、Response向浏览器输出数据
2.1、GetWriter()输出字符数据
基本步骤:获取字符输出流;写出数据
GetWriter()是Writer的子类,它只能向浏览器输出字符数据,不能输出二进制数据
1
2
3
| PrintWriter out = resp.getWriter();
out.write("向浏览器输出数据");
|
在输出过程中可能会出现乱码现象,因为默认的流编码时ISO-8859-1,我们要改成utf-8
1
2
3
| setContentType("text/html");
resp.setCharacterEncoding("utf-8");
|
2.2、GetOutputStream输出字节数据
基本步骤:获取字节输出流;写出数据
1
2
3
| setContentType("text/html;charset=utf-8");
ServletOutputStream out = resp.getOutputStream();
out.write("输出数据".getBytes("utf-8"));
|
3、Response下载文件
前面已经提到过了,利用response下载文件。
这里可以尝试一下Response下载文件,在resource目录下加入一张图片,然后编写FileServlet类,获取工程目录下的资源文件。一开始我们不知道对应的目录在哪儿,可以用getContextPath()拿到当前的上下文context路径
1
2
3
4
5
6
7
8
9
10
11
12
13
14
15
16
17
18
19
20
21
22
23
24
25
26
27
28
29
30
31
32
| public class FileServlet extends HttpServlet {
@Override
protected void doGet(HttpServletRequest req, HttpServletResponse resp) throws ServletException, IOException {
String realPath = "G:\\Kuang_JavaWeb\\servlet-01\\src\\main\\webapp\\resources\\leslie.jpg";
System.out.println("下载路径:"+realPath);
String fileName = realPath.substring(realPath.lastIndexOf("\\")+1);
resp.setHeader("Content-Disposition","attachment; "+"filename: "+fileName);
FileInputStream in = new FileInputStream(realPath);
int len=0;
byte[] buffer = new byte[1024];
ServletOutputStream out = resp.getOutputStream();
while ((len=in.read(buffer))>0){
out.write(buffer,0,len);
}
in.close();
out.close();
}
@Override
protected void doPost(HttpServletRequest req, HttpServletResponse resp) throws ServletException, IOException {
doGet(req, resp);
}
}
|
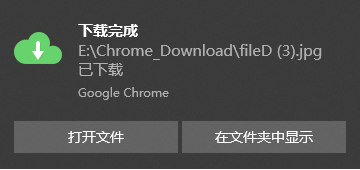

可以看到成功下载了
4、Response实现验证码
我们在登录的时候经常会输入验证码,通过response可以实现类似的功能。
- 自动定时刷新;通过设置
setHeader("refresh","3")实现3秒定时刷新
- 采用BufferedImage生成图片;
- graphics2D写入我们生成的随机数到之前的图片上;
- 设置缓存,浏览器本身具有缓存机制,会导致每次图片都一样,所以要禁止掉;
编写代码如下:
1
2
3
4
5
6
7
8
9
10
11
12
13
14
15
16
17
18
19
20
21
22
23
24
25
26
27
28
29
30
31
32
33
34
35
36
37
38
39
40
41
42
43
44
45
| public class ImageServlet extends HttpServlet {
@Override
protected void doGet(HttpServletRequest req, HttpServletResponse resp) throws ServletException, IOException {
resp.setHeader("refresh","3");
BufferedImage image = new BufferedImage(80,20,BufferedImage.TYPE_INT_RGB);
Graphics2D graphics = (Graphics2D) image.getGraphics();
graphics.setColor(Color.white);
graphics.fillRect(0,0,80,20);
graphics.setColor(Color.BLUE);
graphics.setFont(new Font(null,Font.BOLD,20));
graphics.drawString(getNum(),0,20);
resp.setContentType("image/jpeg");
resp.setDateHeader("expires",-1);
resp.setHeader("Cache-Control","no-cache");
resp.setHeader("Pragma","no-cache");
ImageIO.write(image,"jpg",resp.getOutputStream());
}
private String getNum(){
Random random = new Random();
String num = random.nextInt(9999999)+"";
StringBuffer sb = new StringBuffer();
for(int i=0;i<7-num.length();i++){
sb.append("0");
}
num = sb.toString()+num;
return num;
}
@Override
protected void doPost(HttpServletRequest req, HttpServletResponse resp) throws ServletException, IOException {
doGet(req, resp);
}
}
|
三、Request对象及其应用
request是service()方法中的一个参数,在客户端发出请求时,服务器创建一个request对象并将请求数据封装到request中,然后调用service()方法传递。浏览器的信息都会封装在request中
request作用:获取请求头、请求参数;域对象功能;请求转发和包含
1、作为域对象使用
相比较于ServletContext这种对应整个应用的域对象,request则是指一个请求对应的域对象。它是一个map结构,实现存值取值操作。常用的方法有:
1
2
3
4
| req.getAttribute(String name);
req.setAttribute(String name);
req.removeAttribute(String name);
req.getAttributeName();
|
编写代码如下:
1
2
3
4
5
6
7
8
9
10
11
12
13
14
15
| <%@ page contentType="text/html;charset=UTF-8" language="java" %>
<html>
<body>
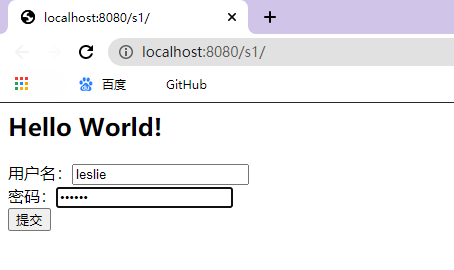
<h2>Hello World!</h2>
<%--这里提交的路径,应该是后面跳转的项目的目标路径--%>
<%--${pageContext.request.contextPath}代表当前项目--%>
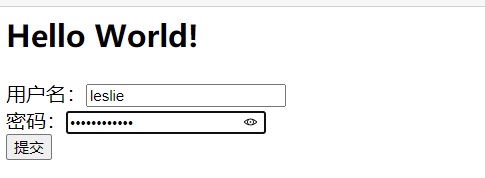
<form action="${pageContext.request.contextPath}/requestServlet" method="get">
用户名:<input type="text" name="user"><br>
密码:<input type="password" name="pwd"><br>
<input type="submit">
</form>
</body>
</html>
|
通过get方式提交数据
1
2
3
4
5
6
7
8
9
10
11
12
13
14
15
16
17
18
19
20
| public class requestServlet extends HttpServlet {
@Override
protected void doGet(HttpServletRequest req, HttpServletResponse resp) throws ServletException, IOException {
req.setCharacterEncoding("utf-8");
resp.setCharacterEncoding("utf-8");
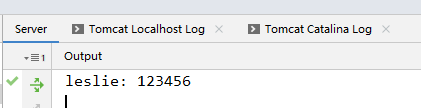
String user = req.getParameter("user");
String pwd = req.getParameter("pwd");
System.out.println(user+": "+pwd);
resp.sendRedirect("/s1/redirectSuccess.jsp");
}
@Override
protected void doPost(HttpServletRequest req, HttpServletResponse resp) throws ServletException, IOException {
doGet(req, resp);
}
}
|
可以看到提交之后实现跳转数据提交成功

2、实现转发
response的sendRedirect可以实现重定向,在request中也有实现页面跳转的功能,在之前的ServletContext部分就说明过,
1
2
3
4
5
6
7
8
9
10
11
12
13
14
15
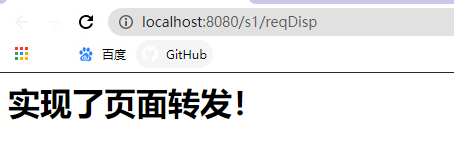
| public class reqDisp extends HttpServlet {
@Override
protected void doGet(HttpServletRequest req, HttpServletResponse resp) throws ServletException, IOException {
RequestDispatcher dispatcher = req.getRequestDispatcher("/reqDispFile.jsp");
dispatcher.forward(req,resp);
System.out.println("request测试Dispatch!!!");
}
@Override
protected void doPut(HttpServletRequest req, HttpServletResponse resp) throws ServletException, IOException {
doGet(req, resp);
}
}
|
访问http://localhost:8080/s1/reqDisp进入到了reqDispFile.jsp页面中,说明跳转成功了!
由于request也是域对象,因此它也可以实现数据的传递,只不过request的域只代表当前一次请求
分别编写两个类用于数据传递
1
2
3
4
5
6
7
8
9
10
11
12
13
14
15
16
17
18
19
20
21
22
| public class reqDispData extends HttpServlet {
@Override
protected void doGet(HttpServletRequest req, HttpServletResponse resp) throws ServletException, IOException {
req.setAttribute("usrname","zhangSan");
RequestDispatcher dispatcher = req.getRequestDispatcher("/reqDispData2");
dispatcher.forward(req,resp);
System.out.println("request测试Dispatch!!!");
}
}
public class reqDispData2 extends HttpServlet {
@Override
protected void doGet(HttpServletRequest req, HttpServletResponse resp) throws ServletException, IOException {
resp.setContentType("text/html;charset=utf-8");
String usrname = (String) req.getAttribute("usrname");
resp.getWriter().write("通过request获取的name是:"+usrname);
}
}
|
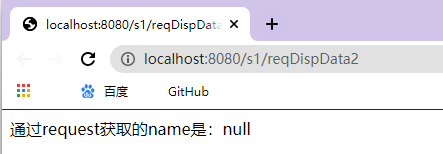
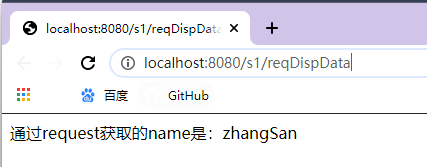
先直接访问Data2是显示为null的,表示没有数据传过去;然后进入Data,他会设置属性值并且页面跳转到Data2的页面中,显示出名字zhangsan
3、request实现防盗链
编写代码如下:利用Referer标头实现防盗链功能
1
2
3
4
5
6
7
8
9
10
11
12
13
14
15
16
17
18
19
20
21
22
23
| public class reqFDL extends HttpServlet {
@Override
protected void doGet(HttpServletRequest req, HttpServletResponse resp) throws ServletException, IOException {
req.setCharacterEncoding("utf-8");
resp.setContentType("text/html;charset=utf-8");
String referer = req.getHeader("Referer");
if (referer==null|| !referer.startsWith("http://localhost")){
resp.sendRedirect("/FDL.jsp");
return;
}
resp.getWriter().write("从我的网站中进入到此页面的!可以访问!");
}
@Override
protected void doPost(HttpServletRequest req, HttpServletResponse resp) throws ServletException, IOException {
doGet(req, resp);
}
}
|
修改首页提交按钮的跳转,在首页点击提交后可以跳转到目标页面reqFDL中,但是直接访问http://localhost:8080/s1/reqFDL就会跳转到FDL.jsp页面中,不能看到目标页面。
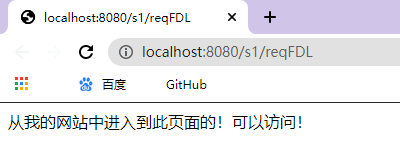
Referer的作用一个是防盗链,只允许自己的网站访问我的资源服务器。Referer作用是指示它从哪儿链接过来,如果为空表示它是直接输入地址访问的
请求转发和重定向的区别
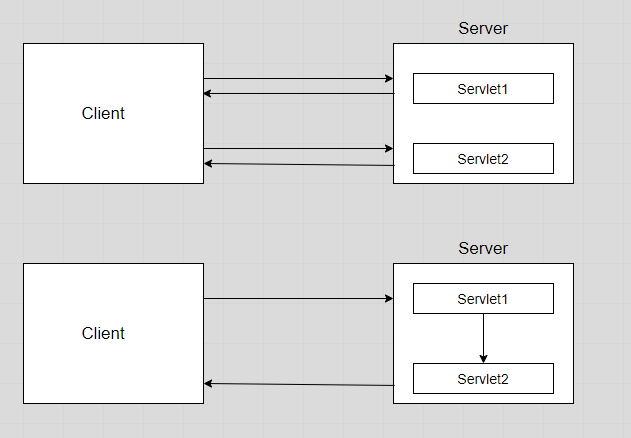
重定向:客户端发送一次请求后,服务器给予响应,这个响应是下一次客户端要访问的地址,于是客户端再次发起请求,然后得到响应,获取想要的数据。即客户端最少要发起两次请求
请求转发:客户端发送一次请求后,请求在服务器端进行传递,客户端仅仅发送了一次请求
他们的区别:
- 转发是在服务器端发生的;重定向是在浏览器端发生的
- 请求次数不同:重定向最少要发送两次、转发只会发送一次
- 转发时浏览器的地址栏不会变化【即这个操作对浏览器是透明的】;重定向时地址栏会发生改变
- 重定向时,我们写的资源地址是:
resp.sendRedirect(URL地址);转发时我们写的地址是:req.getRequestDispatcher(URL地址).forward(request, response)。
- 重定向是跳转,可以到任何资源地址下,即实现跨域访问;转发要求还是在当前web应用下的资源
使用场景:
重定向没有转发快,因为它要再次经过客户端
- 对于跨域的访问,要跳转到外部网站,可以使用重定向
- 转发的request可以传递不同类型数据,因此在有数据传输的任务下可以考虑转发